
Is summer actually the best time to upgrade your home’s look with outdoor painting, or are you just setting yourself up for a peeling, blistered mess? For homeowners across the metro, whether you are looking to spruce up a historic property in Brookside or modernizing a spacious layout out in Lee’s Summit, the long, warm days feel like the perfect opportunity to refresh your space. But as anyone who has survived a July here knows, our unpredictable local climate requires a serious game plan if you want your hard work to actually last through the seasons.
Refresh Your Home for Summer — Get Your Free Estimate Today
When the sun stays out late and the evenings turn warm, the urge to refresh our living spaces peaks. Perhaps you are looking at the fading, weather-beaten siding of your classic 1920s Tudor and realizing it has seen better days. Or maybe you are sitting in your sunlit suburban living room in Overland Park, realizing that the winter gloom has left your indoor walls looking tired, drab, and desperately in need of a modern, light-reflecting color palette.
However, transforming your home during the midwestern heat is not as simple as picking up a brush and slapping on a coat of color. The climate in the Heartland is notoriously fickle. One day you are dealing with baking, arid heat, and the next, a heavy wall of humidity rolls up from the south, accompanied by a surprise late-afternoon thunderstorm. To ensure your home improvement project yields gorgeous, long-lasting results rather than a flaking, blistering nightmare, you need a strategic playbook.
Welcome to Summer Painting 101. Let’s dive into the essential architectural rules, climate hacks, and practical strategies for upgrading your property this season.
The Great Outdoors: Exterior Rules for the KC Heat
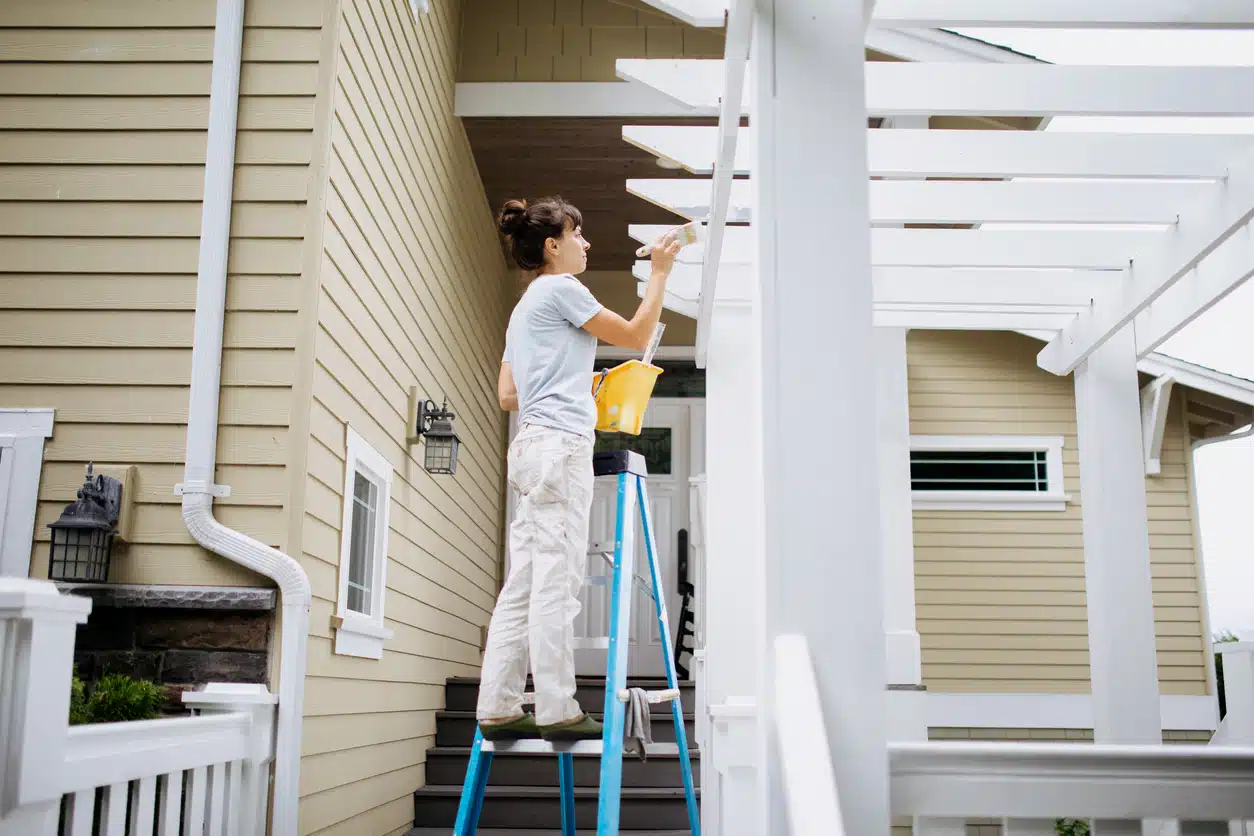
Sprucing up your home’s outer shell boosts curb appeal instantly and provides a critical protective shield against the elements. But outdoor work in the Midwest requires you to play amateur meteorologist. Before you start revamping your trim, stained decks, or transforming your front porch, keep these fundamental guidelines in mind to ensure your hard work survives the seasons.
The Absolute Do’s of Outdoor Work
DO: Chase the Shade Relentlessly
Imagine you are working on a beautiful, historic home in the Hyde Park neighborhood. The morning sun is hitting the east side of the house, warming up the siding until it is hot to the touch. If you apply product directly to those sun-baked wooden planks, you are asking for immediate structural failure of the coating.
When a liquid coating is applied to a hot surface in direct sunlight, the top layer dries almost instantly, trapping moisture and solvents underneath. As those trapped gasses try to escape from the heat, they form unsightly bubbles and blisters in your beautiful finish. The golden rule? Follow the shade. Work on the west side of the house in the morning and transition to the east side in the afternoon once the sun has passed over, ensuring the surface temperature remains cool enough for proper adhesion.
DO: Invest Seriously in Wood Rot Repair
Our local winters are brutal and icy, and our springs are incredibly wet. By the time July rolls around, many older homes in areas like Waldo or Mission have suffered subtle, structural moisture damage. Inspect your window sills, door frames, soffits, and lower siding panels for soft spots before a single drop of pigment touches the house.
Applying fresh color over compromised, rotting wood is like putting a shiny new band-aid over a broken bone. It might hide the issue temporarily, but the underlying structure will continue to decay, eventually destroying your new finish from the inside out. Scrape away the decay, apply a premium exterior wood filler or replace the wood entirely, sand it perfectly smooth, and prime it thoroughly before moving forward.
DO: Allow Ample Drying Time After Power Washing
Prepping your surfaces by blasting away years of accumulated dirt, pollen, spiderwebs, and chalky residue is non-negotiable. However, patience is a virtue that pays massive dividends here. Just because the surface of your siding looks dry three hours after power washing does not mean it actually is. Wood is highly porous and acts like a giant sponge.
If you seal that internal moisture in with a fresh layer of acrylic latex, the blazing summer sun will draw that trapped water out, causing the coat to peel away in sheets by autumn. Give your home a minimum of 48 hours of clear, dry weather to dehydrate completely after a heavy wash before you bring out the brushes and rollers.
Claim Your Summer Paint Job Estimate at Bates Painting
The Definite Don’ts of Outdoor Work
DON’T: Ignore the Humidity Index
We all know that Kansas City humidity can make a simple step outside feel like walking into a warm bowl of soup. While high humidity is incredibly uncomfortable for you, it is downright catastrophic for curing wet products. Most high-quality exterior formulations require the ambient humidity to be below 85% to dry correctly and bond with the substrate.
When the air is heavily saturated with water vapor, the moisture within the wet film cannot evaporate effectively into the atmosphere. This completely disrupts the chemical curing process, leaving you with a soft, gummy finish that easily collects airborne dust, bugs, and dirt. Always check the relative humidity on your local weather app before opening a fresh can of material.
DON’T: Paint When Storms are Within a Whisker
Midwestern summer afternoons are notorious for sudden, unpredicted pop-up thunderstorms. You might look up at 2:00 PM and see clear blue skies over the Country Club Plaza, only to find yourself caught in a torrential downpour by 3:30 PM.
If freshly applied latex is exposed to rain within the first few hours of application, the water can wash the resins right off the wall, leaving behind streaks, uneven pigments, or a completely ruined surface that must be scraped and redone. If there is more than a minor, negligible chance of rain in the local forecast within a four-to-six-hour window of your planned working time, keep the lids on your cans and wait for a safer weather window.
Step Inside: Interior Strategies for a Cool Refresh
When the thermometer outside climbs past the mid-90s, staying indoors next to a humming air conditioner sounds like paradise. This makes the summer season an exceptional time to reimagine your indoor spaces. Whether you want to turn a dark basement into a bright family room or give your kitchen a clean, minimalist vibe, indoor projects offer a controlled environment—if you manage that environment correctly.
The Crucial Do’s of Indoor Projects
DO: Lean Heavily on Your Climate Control
The biggest advantage of working indoors during a sweltering July is that you hold the thermostat in your hands. To achieve a flawless, smooth finish on your drywall, trim, or cabinetry, aim to keep your indoor temperature consistent—ideally between 65°F and 75°F.
Running your air conditioning does more than just keep you comfortable; it acts as a built-in dehumidifier. By pulling excess moisture out of the indoor air, your HVAC system creates the absolute perfect environment for interior acrylic and latex products to cure evenly, preventing lap marks and ensuring maximum durability.
Schedule Your Indoor Transformation Today
DO: Account for Changing Natural Light
Consider a hypothetical scenario: you are updating the primary bedroom of a beautiful new build in Leawood. In the dead of winter, the low angle of the sun might make a cool gray look sophisticated. But under the intense, blazing glare of a summer sun reflecting off lush green lawns, that same gray might take on a strange, sickly greenish undertone or look blindingly bright.
When choosing interior colors during the sunniest months of the year, always paint large test swatches on multiple walls. Observe how the shade transforms at 8:00 AM, noon, and 7:00 PM under both natural sunlight and your artificial indoor fixtures before committing to the whole room.
DO: Maintain Pristine Airflow
While you want your AC running to control the temperature and humidity, you also need to keep the air moving to dispel volatile organic compounds (VOCs) and assist the drying process.
Utilize ceiling fans on a low setting or set up box fans to keep air circulating gently throughout the room. Just make sure the room is completely clean and dust-free before turning on any fans; otherwise, you risk blowing loose debris, pet hair, or drywall dust straight into your wet, sticky walls, ruining your smooth finish.
The Hidden Don’ts of Indoor Projects
DON’T: Rush the Window Between Coats
Because indoor spaces feel cool and dry, it can be incredibly tempting to assume a wall is ready for its second coat after just an hour. Touching a wall and finding it dry to the touch is a deceptive metric. “Dry to the touch” simply means the outer skin has flashed off.
The underlying layers are still undergoing a chemical process to fuse and harden. If you apply a second coat too quickly, you trap those lower solvents, leading to a finish that remains tacky for weeks, or worse, a surface that easily sags, wrinkles, and mars when furniture is pushed against it. Always follow the manufacturer’s recommended re-coat window to the letter.
DON’T: Track Summer Messes Across the House
Summer projects often involve a lot of back-and-forth movement. You might be rinsing brushes at an outdoor spigot, cutting trim in the garage, or stepping outside to grab a tool.
With outdoor activity comes tracking in freshly cut grass, dusty soil, or sticky asphalt residue on your shoes. Take the time to lay down durable drop cloths, heavy-duty rosin paper, or plastic pathways from the entrance of your home directly to the workspace. A single drop of overlooked grease or a stray blade of grass ground into a hardwood floor or carpet can turn a fun home improvement project into a costly cleaning disaster.
DON’T: Skip the Dust-Clearing Phase After Sanding
No one loves the tedious process of sanding down old brush strokes, patching drywall divots, or smoothing out rough trim. When it’s warm out, the temptation to cut corners and skip straight to the fun part—the color—is incredibly high.
But if you leave a fine layer of white drywall dust on the surface, your new coat will adhere to the dust rather than the actual wall. Over time, the film will begin to bubble, peel, or crack away. After sanding, always use a vacuum with a brush attachment followed by a damp microfiber cloth or tack cloth to remove every single speck of debris.
Contact the Professionals at Bates Painting

Frequently Asked Questions
Q: Is summer truly the best season to paint the outside of my home, or should I wait for autumn?
Summer is an excellent time because the consistently warm temperatures ensure that the chemical bonds in modern coatings form perfectly. However, autumn also offers great conditions with lower humidity. The key to summer success is simply avoiding extreme weather anomalies—such as days when the temperature climbs to extreme highs or periods of oppressive, suffocating humidity. If you manage the timing and follow the shade, a summer application provides incredible longevity and protection.
Q: How long should I let my freshly painted interior rooms cure before moving my furniture back?
While modern interior latex paints generally dry to the touch within a couple of hours, they remain susceptible to indentation and scratching for several days. It takes roughly two to four weeks for a standard latex coating to fully cure to its maximum hardness. For practical purposes, you can safely move your furniture back into the room and hang light wall decor after 24 to 48 hours. Just be sure to leave a small gap between the furniture backs and the fresh walls for the first week to prevent sticking.
Q: Why should I hire a professional team rather than making this a DIY weekend project?
While handling a paintbrush can be rewarding, executing a flawless, enduring project requires an immense amount of preparation, specialized equipment, and specialized knowledge of structural dynamics. A professional team knows exactly how to navigate the volatile local climate, identify hidden structural vulnerabilities like wood rot, and apply flawless coats safely using professional-grade scaffolding and sprayers. Hiring experts saves you time, spares you from laboring in the intense heat, and ensures a pristine finish backed by a reliable warranty.
Your Home Deserves a Flawless Finish
Your home is likely your single largest investment, and it deserves to look its absolute best whether it’s viewed from the street or enjoyed from the comfort of your couch. Navigating the unique nuances of midwestern weather, meticulous preparation, and material selection can quickly turn a simple weekend project into a stressful, overwhelming ordeal.
If you are ready to elevate your property without spending your precious summer weekends sweating on a tall ladder or scrubbing tracking marks out of your carpets, let the seasoned professionals handle the heavy lifting. At Bates Painting, we bring generations of craftsmanship, deep knowledge of local architectural styles, and an uncompromising commitment to quality to every square inch we touch. We handle the prep, manage the unpredictable climate variables, and deliver a breathtaking transformation that will leave your neighbors envious for years to come.
Ready to bring your vision to life? Get in touch with our friendly, local team today to discuss your next project and secure your spot on our summer schedule!